Kitchen Island Guide for Georgia Homes
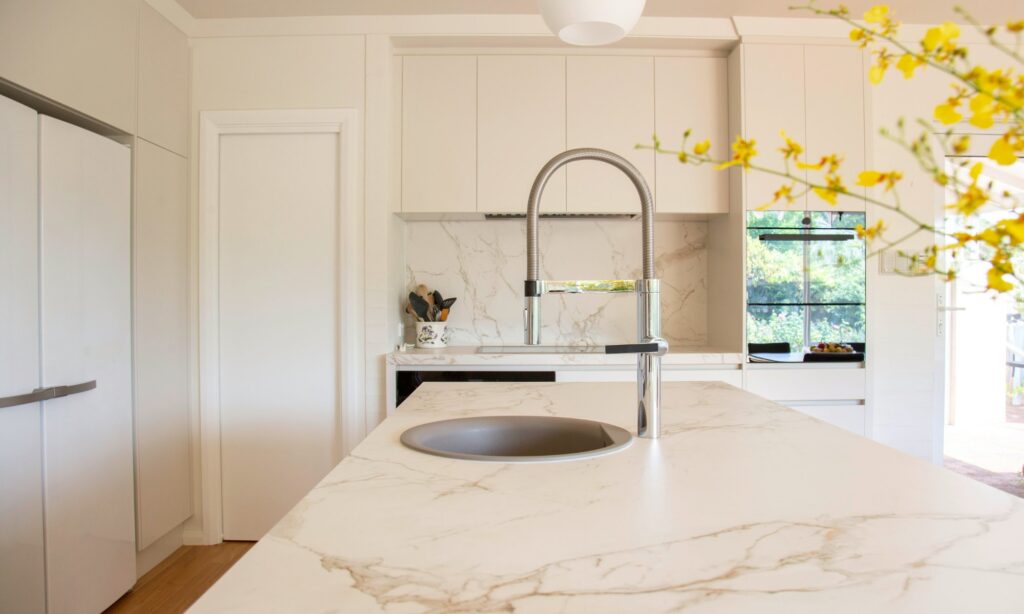
Planning kitchen island guide in Georgia? A kitchen island can become the center of daily life, serving as prep space, dining spot, homework station and gathering place. But an island that is too large, too small or poorly placed can make a kitchen worse.
This guide covers sizing, clearances, seating and features so you can decide whether an island fits your kitchen.
In this guide
Does your kitchen need one?
Islands work best when there is room for traffic around them. In narrow kitchens, a peninsula or a mobile cart may be a better choice. Measure carefully before committing.
Clearances
Allow about forty-two to forty-eight inches of aisle space around an island so people can pass and open appliances. Tighter spaces make working uncomfortable.
Size and shape
A typical island is roughly two to four feet deep and as long as the space permits. Rectangular islands are common; curved or L-shaped designs can improve flow. Very large islands need support at overhangs and careful seams.
Seating
Counter seating needs about twenty-four inches of width per person and an overhang of roughly ten to twelve inches. Place stools away from the cooking zone for safety.
What to put in the island
Sinks, cooktops, dishwashers, storage drawers and microwave drawers are options. Each adds plumbing, electrical or ventilation requirements, which affect cost and layout.
Electrical and code
Outlets in or near islands must follow code and should be planned early. Discuss placement, appliances and lighting before the floor is installed.
Counter materials
Quartz, granite and other surfaces suit islands. Choose durability, maintenance and appearance. Contrasting the island with perimeter counters adds interest.
Lighting over the island
Pendants or linear fixtures provide task and ambient light. Hang them at a comfortable height so they do not block sightlines.
Storage and function
Deep drawers, pull-outs, open shelves and hidden outlets turn an island into a hardworking piece. Consider a trash pull-out and a place for stools.
Mistakes to avoid
Common mistakes include insufficient clearance, putting the sink and cooktop on the island without ventilation planning, forgetting outlets and choosing seating that is too tight.
Planning essentials for any remodeling project
Whatever you are building, a handful of habits keep projects on track. Define your goals and rank them as must-have, nice-to-have and later. Set a budget that includes a contingency for hidden conditions, because walls often reveal surprises. Gather two or three itemized estimates for the same scope so differences are easy to see, and compare what is included rather than only the total.
Make selections early
Cabinets, windows, tile, flooring and fixtures can have long lead times. Choosing them before construction starts keeps trades from waiting and prevents rushed compromises. Keep a simple list with product names, colors, model numbers and delivery dates, and share it with your contractor so everyone works from the same information.
Communicate in writing
Agree on how you will receive updates and how changes will be handled. When scope changes, ask for a written change order that states the cost and schedule effect before work proceeds. Keep photos of the work before walls close so you know where wiring and plumbing run, and store contracts, permits, warranties and product information together for future reference.
Prepare your household
Remodeling brings dust, noise and limited access to rooms. Set up temporary arrangements for cooking or bathing if needed, protect belongings, plan for pets and children and agree on working hours and daily cleanup. A little preparation before demolition makes the weeks that follow easier for everyone in the house.
Finish with a walkthrough
As the project ends, walk each room with your contractor in good light. Note anything incomplete or not as specified and agree on a punch list with dates. Hold final payment until the list is complete and you have warranties and care instructions in hand.
How a project with Juniper & Forge works
Every project starts with a free in-home estimate. We walk through the space, listen to what is not working and look at structure, systems and finishes. We then outline scope options, explain the main cost drivers and describe the steps that follow. After you review a written, itemized estimate, we handle permits, order long-lead materials, schedule trades and keep you updated through construction. A final walkthrough and punch list close the project. Our process page describes each stage.
Common mistakes to avoid
The most frequent problems are choosing on price alone, skipping the contingency, changing the scope after work begins, leaving selections until the last minute and assuming allowances will cover premium finishes. Another is failing to ask how the schedule handles inspections and deliveries. Awareness of these pitfalls makes them easy to avoid, and a clear written scope removes most of the risk.
What to bring to your estimate
Photos of the space, a list of problems you want solved, any inspiration images, plans or HOA documents you have and your target timeline and budget range. If you already have other estimates, bring them and we will help you compare scope line by line. This preparation takes a few minutes and makes the visit much more useful.
Care, warranty and records after the project
When the work is finished, ask for care instructions for every surface and product, the names and colors of finishes for future touch-ups and the warranty terms for materials and workmanship. Keep contracts, change orders, permits, inspection records and photos together with your home documents. Schedule seasonal checks, such as cleaning gutters, inspecting caulk and sealants and testing alarms, so small issues are fixed before they grow. Good records also make future projects and resale simpler.
Choosing the right contractor
Look for clear written scopes, appropriate insurance, references you can contact and a willingness to explain tradeoffs honestly. Compare bids on the same scope, ask who will be on site and confirm how changes and delays are handled. Our guide to choosing a remodeling contractor lists more questions worth asking before you sign.
Mobile islands and carts
If a fixed island will not fit, a rolling cart or butcher-block table provides extra prep space and can move when you host. Choose a sturdy model with locking wheels.
Entertaining with an island
Place seating on the side facing the living area and keep cooking tasks on the work side. Add a prep sink or beverage station if guests frequently gather.
Ventilation for island cooktops
Cooktops on islands need strong ventilation, such as a hood hung from the ceiling or a downdraft system. Ceiling height, duct runs and noise all affect the choice.
Cost considerations
Plumbing, electrical, structural support and custom cabinets raise cost. A simple island with storage and seating is far less expensive than one that contains major appliances.
Questions before you finalize
Walk through your daily routine with a tape measure or painter’s tape on the floor to simulate the island. Check door swings, aisle widths and sightlines before ordering.
Final thought
The best island fits the room, the way you cook and the number of people who gather. When clearances are tight, a smaller island or none at all often works better.
Care and finishes
Choose a surface and cabinet finish that handles spills, hot pans and daily use, and plan outlet covers and lighting so the island works hard and looks good for years.
Planning tip
Mock up your island with cardboard or tape for a day or two. Cook a meal and walk through the room to confirm the size feels right.
Questions to ask before you hire for kitchen island guide
- What exactly is included in the written scope, and what is excluded?
- Which items are allowances, and what happens if my choices cost more?
- Who pulls permits and schedules inspections?
- How will changes be priced and approved in writing?
- Who supervises the work day to day, and how will you update me?
- What warranty applies to workmanship and to materials?
How cost and schedule are shaped
Cost for kitchen island guide depends on scope, size, materials, the complexity of the work and the condition of the existing home. Hidden conditions such as old wiring, moisture damage or framing surprises can change a budget, so a contingency is wise. Schedule depends on design time, permit review, material lead times and weather for exterior work. Ask for itemized pricing and a written schedule, and read our cost guide and timeline guide for the main drivers.
Permits and approvals
Many remodeling projects need permits and some neighborhoods require homeowners association approval. Requirements vary by city and county, so confirm what applies to your address before work starts. Our permits guide explains the basics for Acworth and Cobb County.
Frequently asked questions
How big should an island be?
As large as clearances allow, often at least four feet long.
Can I add one to a small kitchen?
Sometimes; a cart or peninsula may be better.
Do islands need permits?
Electrical and plumbing changes do.
Related pages
Request an estimate
Request a free in-home estimate or call (470) 847-9076. We will review your home, listen to your goals and explain options and next steps.
Ready to plan your project?
Free in-home estimate — call (470) 847-9076, or send a request online.
Request an estimateCall (470) 847-9076